* 安装配置
1、把 https://github.com/zalando/SwiftMonkey 下载下来。
2、把 SwiftMonkey 和 SwiftMonkeyPaws 目录粘贴到你的项目目录下去。

3、然后把他们两的 xcodeproj 拖到项目中去(必须是下面的目录结构)。

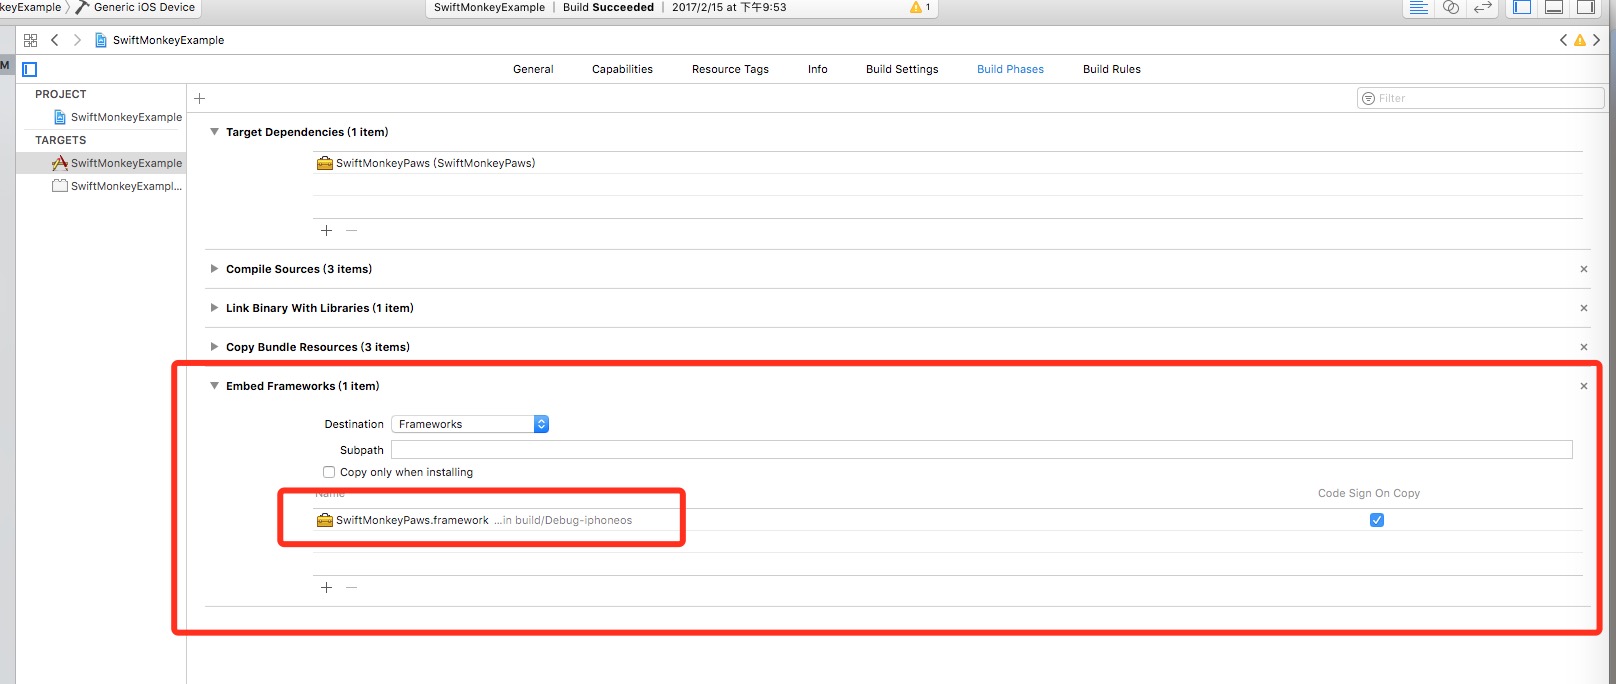
4、把 SwiftMonkey.framework 添加为你的 test target 的依赖。在 test 的 build phase 那里添加 Copy Files。如图:

5、对于 SwiftMonkeyPaws,这个玩意就是让你的事件会有一个熊掌的反馈,这个得放到 app 的 target 里去,因为是 app 使用的。放到 Embedded Binaries 即可,如图:
然后在你应用里任何地方导入 SwiftMonkeyPaws,初始化它就可以了。
import SwiftMonkeyPaws
var paws: MonkeyPaws?
func application(_ application: UIApplication, didFinishLaunchingWithOptions launchOptions: [UIApplicationLaunchOptionsKey: Any]?) -> Bool {
    if CommandLine.arguments.contains("--MonkeyPaws") {
        paws = MonkeyPaws(view: window!)
    }
    return true
}
6、新建一个 XCUITesting 的新项目,如图:
Paste_Image.png
记得语言栏勾选:Swift
Paste_Image.png


7、然后在新建的UITests文件粘贴下面的未注释代码(所有未注释代码)
//  SwiftMonkeyExampleUITests.swift
//  SwiftMonkeyExampleUITests
//
//  Created by Dag Agren on 07/11/2016.
//  Copyright © 2016 Zalando SE. All rights reserved.
//

import XCTest
import SwiftMonkey

class SwiftMonkeyExampleUITests: XCTestCase {

   override func setUp() {
       super.setUp()
       XCUIApplication().launch()
   }

   override func tearDown() {
       super.tearDown()
   }

   func testMonkey() {
       let application = XCUIApplication()

       // Workaround for bug in Xcode 7.3. Snapshots are not properly updated
       // when you initially call app.frame, resulting in a zero-sized rect.
       // Doing a random query seems to update everything properly.
       // TODO: Remove this when the Xcode bug is fixed!
       _ = application.descendants(matching: .any).element(boundBy: 0).frame

       // Initialise the monkey tester with the current device
       // frame. Giving an explicit seed will make it generate
       // the same sequence of events on each run, and leaving it
       // out will generate a new sequence on each run.
       let monkey = Monkey(frame: application.frame)
       //let monkey = Monkey(seed: 123, frame: application.frame)

       // Add actions for the monkey to perform. We just use a
       // default set of actions for this, which is usually enough.
       // Use either one of these but maybe not both.
       // XCTest private actions seem to work better at the moment.
       // UIAutomation actions seem to work only on the simulator.
       monkey.addDefaultXCTestPrivateActions()
       //monkey.addDefaultUIAutomationActions()

       // Occasionally, use the regular XCTest functionality
       // to check if an alert is shown, and click a random
       // button on it.
       monkey.addXCTestTapAlertAction(interval: 100, application: application)

       // Run the monkey test indefinitely.
       monkey.monkeyAround()
   }
}
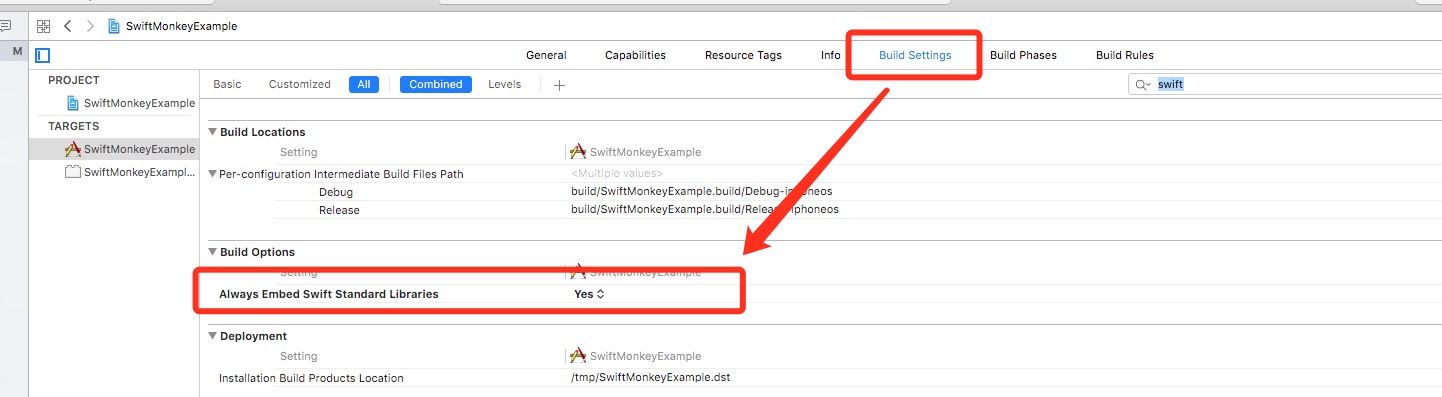
8、同时,别忘记在 build setting 里勾选上 Swift 的标准库,如图: