Features
- The power meter can communicate with the meter reader by carrier wave or wireless mode. The transmission is transparent and not be interfered by the user.
- The power meter (Modebus RTU) supports 485 interface, and it can work without the meter reader. The split core transformer is also provided for easy installation.
- Mode1 for meter reading: the carrier wave data are output by serial port (CH340). The meter reading is realized by reading serial port data through PC or Openwrt.
- Mode2 for meter reading: Built-in ESP12 module, which can be programmed directly, and through ESP12 to realize meter reading by carrier wave.
Sigle-phase power meter
Interface type:1 RS-485 interface;1 carrier wave;1 wireless
Communication protocol: MODBUS-RTU specifications;
Data format: 8, N, 1";
Power Meter MODBUS RTU Key Parameters
| Register | Description |
|---|---|
| 0048H (Read-only) | Voltage,Unsigned number,Value=DATA/100, Unit V |
| 0049H (Read-only) | Current,Unsigned number,Value=DATA/100,Unit A |
| 004AH (Read-only) | Active power,Unsigned number,Value=DATA,Unit W |
| 004BH-004CH(Read-only) | Forward active energy,Unsigned number,Value=DATA/3200,Unit kWh |
Test patyway &Protocols by 485
It is recommended to test 485 pathway and protocols by connecting the power meter with 485 and PC.
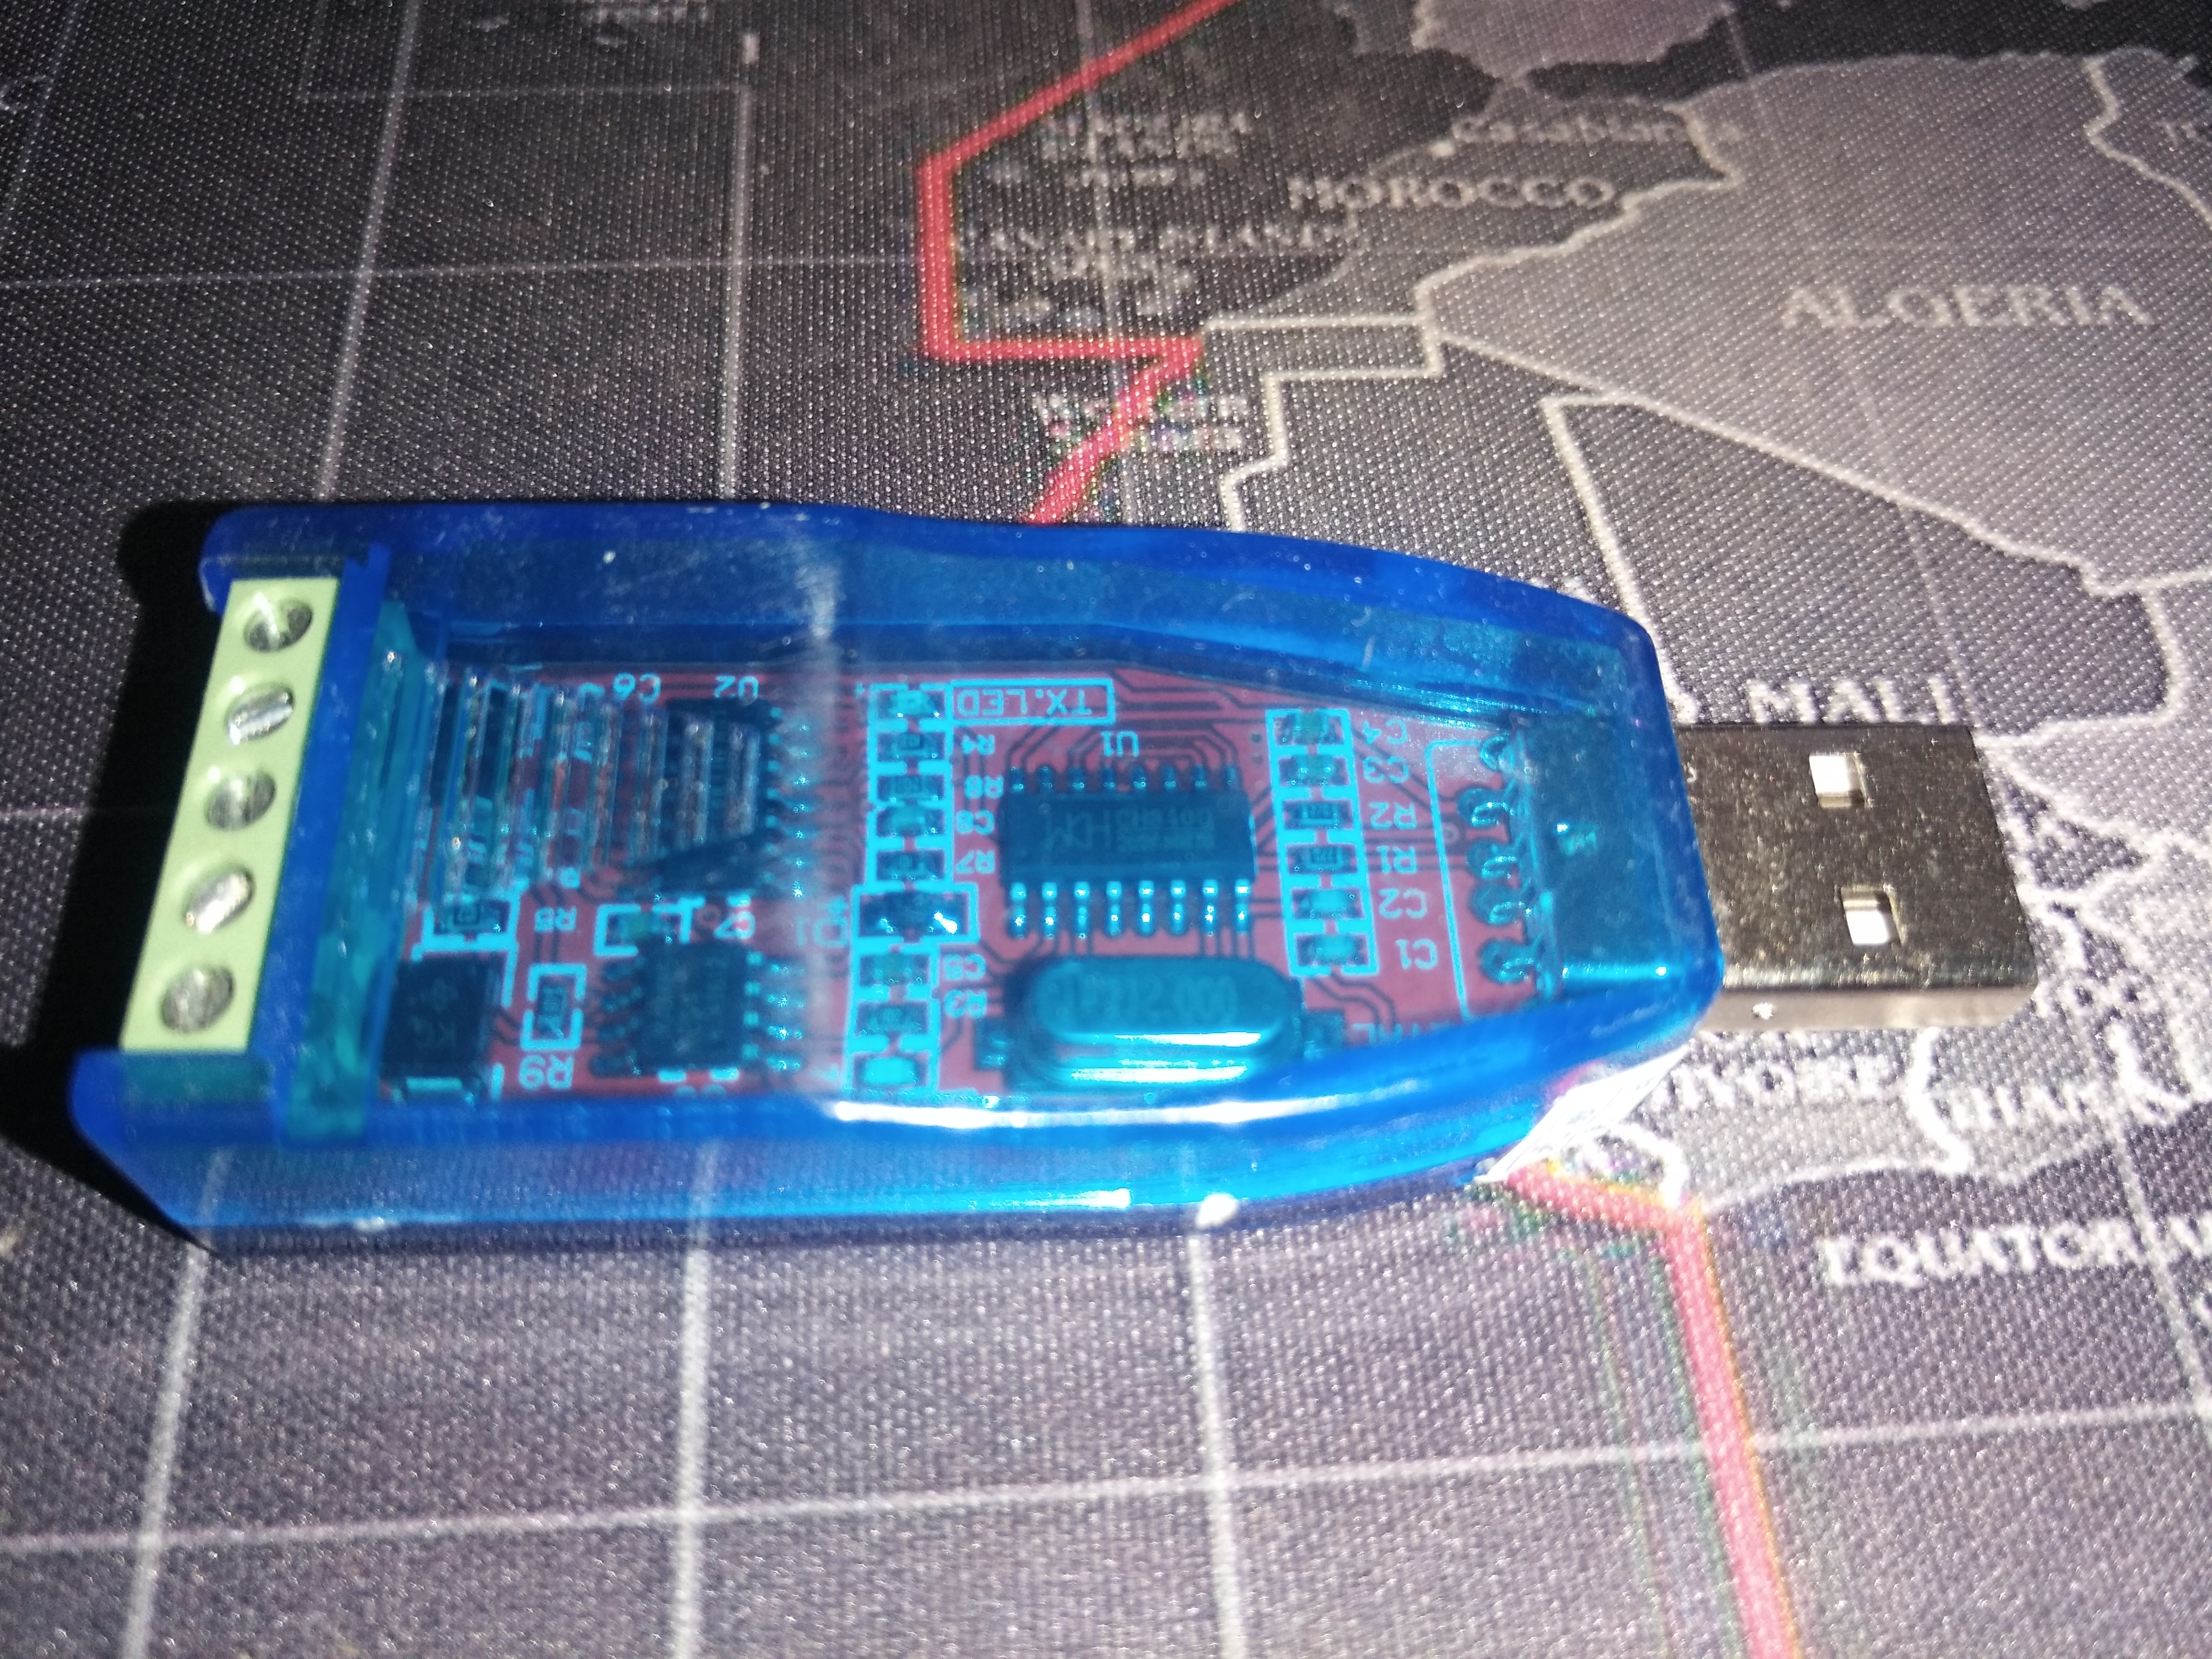
1 USB-485 dongle is needed, such as the one in the following picture.
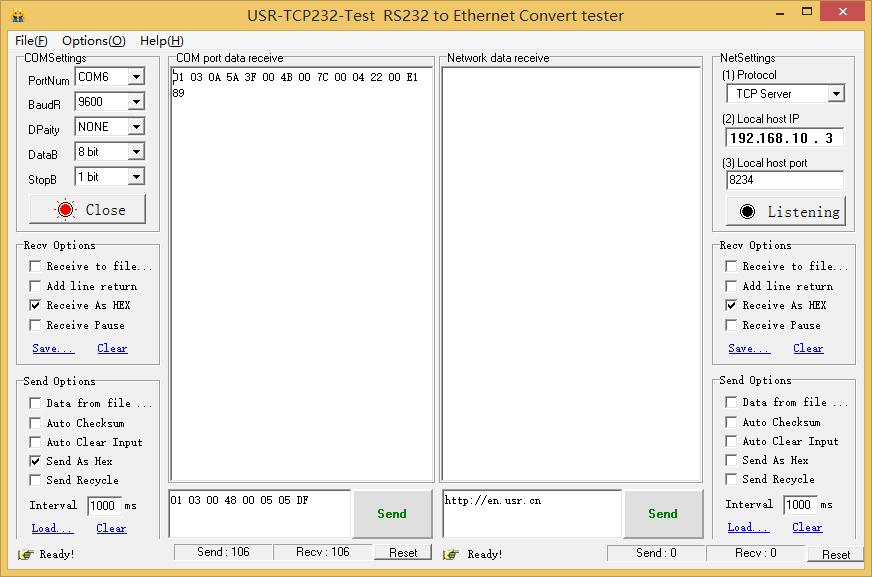
Send:01 03 00 48 00 05 05 DF
Receive:01 03 0A 5A 3F 00 4B 00 7C 00 04 22 00 E1 89
Description:
Voltage:0x5A3F/100
Current:0x004B /100
Power:0x007C
Energy:0x042200/3200
Please refer to the following picture:
Meter reader
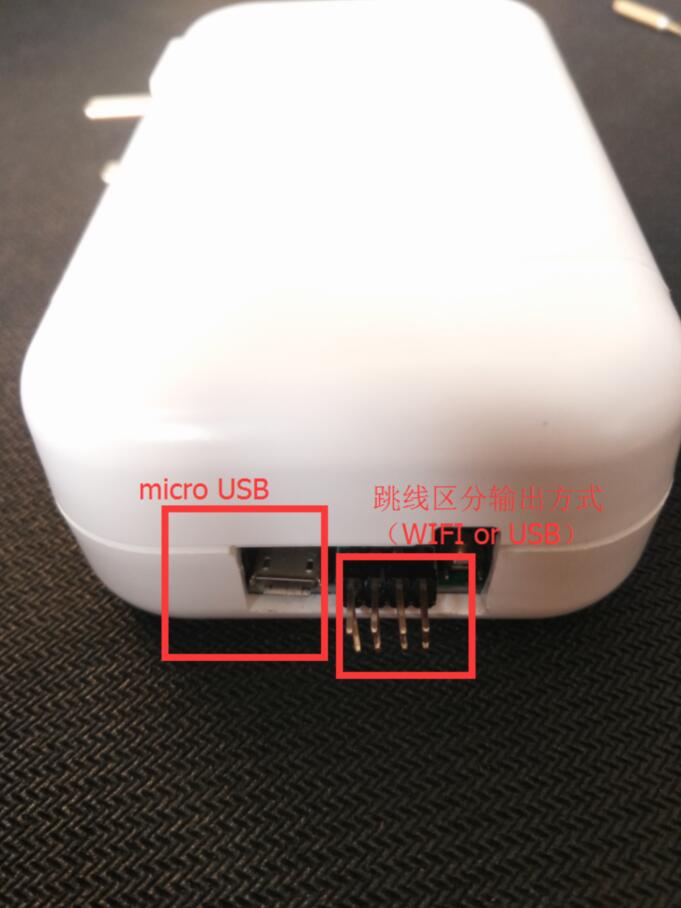
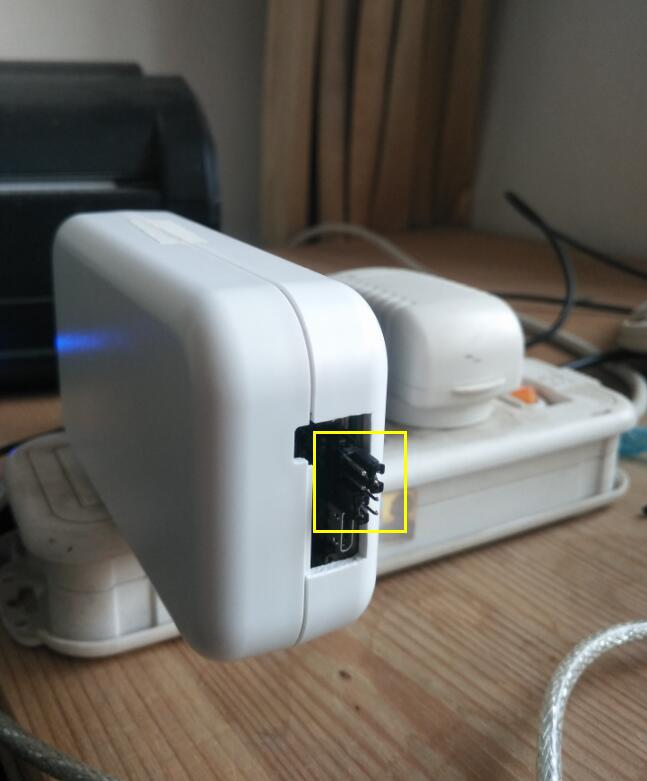
Pay attention to the jumper pins, and you can switch the following three modes through these pins
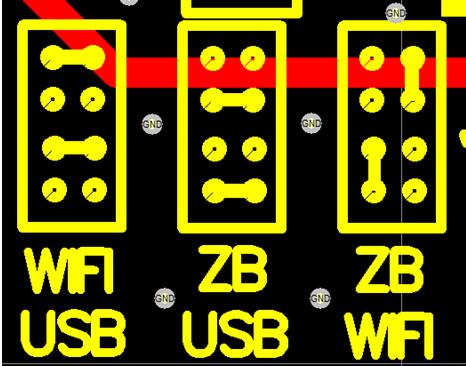
- wifi-usb The mode to download firmware for the built-in ESP12.
- ZB-USB Direct carrier communication meter reading mode through the USB interface(Meter reading mode 1 in the proceding paragraph)
- ZB-WIFI Direct carrier meter reading mode through the ESP12 (Meter reading mode 2 in the proceding paragraph)
Get Started with 3 Steps
Step1:Amount the power meter in the power distribution cabinet (most important)
Note: The strong electricity is very dangerous. Do not amount it by yourself unless you know how to connect the wires. It is better to ask electrician for help! Be careful! Be careful!
Clip the CT of the power meter to the live wire of the distribution box, and connect the two lines of voltage transformer to the null line and live wire, as the following picture shows.
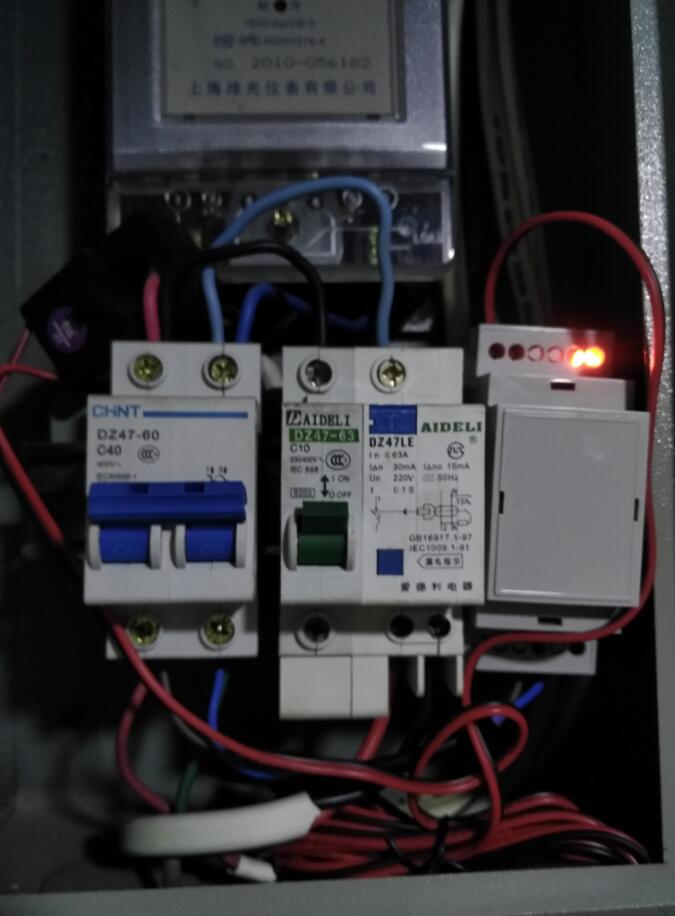
Step 2:Configuration
Power up the reader! Please make sure the jumper position is at where esp12 communicates with carrier module (the position marked by the yellow square is ZB-WIFI mentioned as mode 2 in the previous paragraph. ) Make sure the meter reader and the power meter is in the same-phase power grid with no transformer (usually no problem with the normal family)
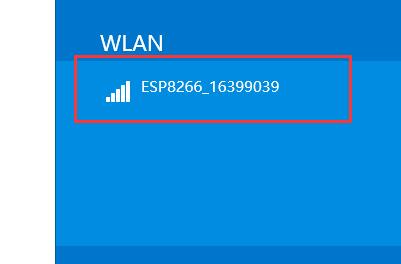
Search for ssid which starts with esp and link it,password:12345678
After link, login to 192.168.4.1,as the following picture shows.
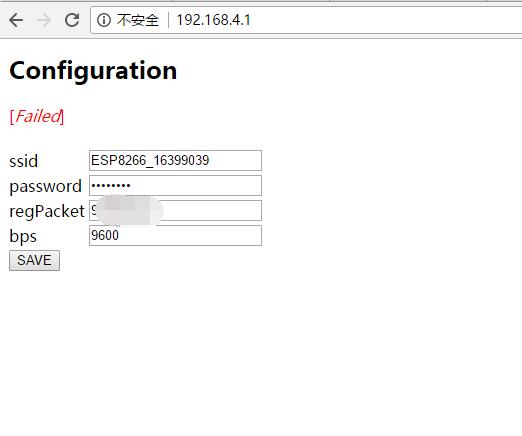
ssid: The ssid of the uplink router which you need to connect
password:The password of the uplink router which you need to connect
regpacket:SN of DeviceBit Energy Monitoring Platform. If the meter reader is purchased from DeveciBit, this SN has been filled in automatically. Otherwise, you can apply for it by sending email to service#lewei50.com (change # to @)
bsp:Baud rate, please fill in 9600 here.
Theoretically, the DTU firmware should have been downloadedthe for the meter reader, so this step can be omitted. If you do not download the DTU firmware, download the firmware yourself.
DeviceBit WIFI DTU Firmware
Click on save. If the reader is linked to the upling router, this ap which starts with esp will disappear. You can confirm it by checking whether there is one more WiFi device on the uplink router.
Step3:Monitor the power on DeviceBit Energy Plarform
DeviceBit Energy Plarform:pm.lewei50.com
If you don't have an account, please register one first. Please note the sn here is the regpacket mentioned above.
Then, please not the following things:
- Please select the time zone in the location settings, and generally select the +8 time zone in China.

- Please select the power meter type and slaveID in the meter settings. Currently JSY-149 is supported or you can customize by yourself. Please just select JSY-149 if you use the power meter and the supporting reader.

- If you use the power meter of other manufacturers, you can choose customize, and then set the settings according to the actual content of the register.

Congratulations! If everything is OK, you can see the data on DeviceBit energy platform.

Other working modes of meter reader
In addition to ZB-WIFI mode, there is also ZB-USB transparent transmission mode. This mode can be used to evaluate whether the carrier communication is successful or not. The ZB-USB working mode is as follows:
Step1:Plug the meter reader into a socket and adjust the jumper to mode 1 (ZB-USB, the middle position on the jumper picture above).
Note: the meter reader and the power meter can not be separated by transformer, and should be in phase (If the power meter is not three-phase, there is no need to consider this problem.)
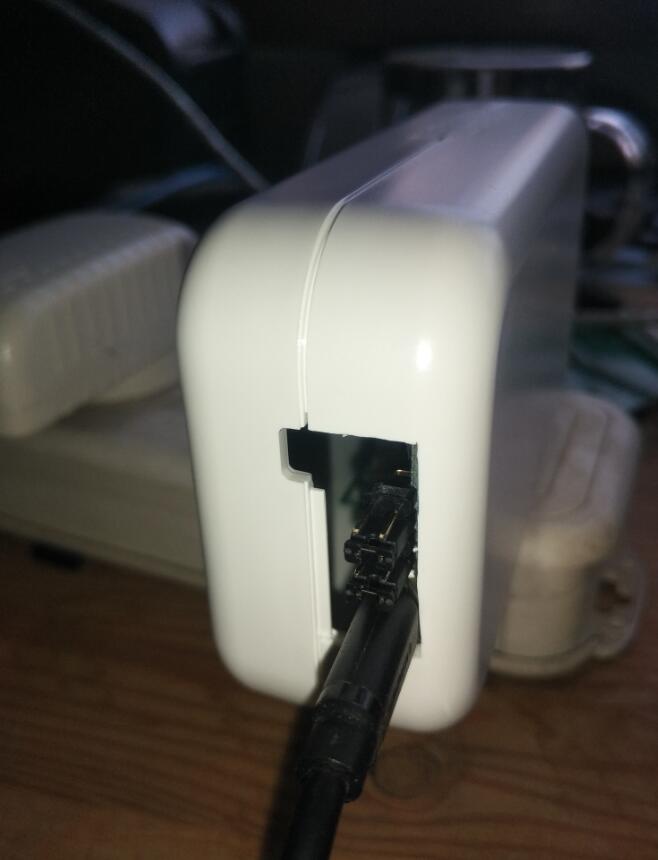
Step 2:Connect Micro USB to PC
If you need to install the driver, install it by yourself (CP2102).
Then, open the serial port software, send data, and see the results as below.

The difference is the data are returned not as quickly as with 485 when click on Send, because carrier communication is very slow.