Table of Contents
<a id="1"></a>Introduction
Google Analytics is a freemium web analytics service offered by Google that tracks and reports website traffic. You can visit here for more information.
In this post, we are going to add goole analytics to a jekyll website. This blog is an example website, having contained google analytics code already.
<a id="2"></a>Method
<a id="21"></a>Step One
To add google analytics, you should visit google analytics website and sign up a google account:


For Chinese version, you can visit here. If you have had a google account, you can log in and go to next step.
<a id="22"></a>Step Two
After you have a google account and log in google analytics website, you need to follow the guide to register for google analytics.
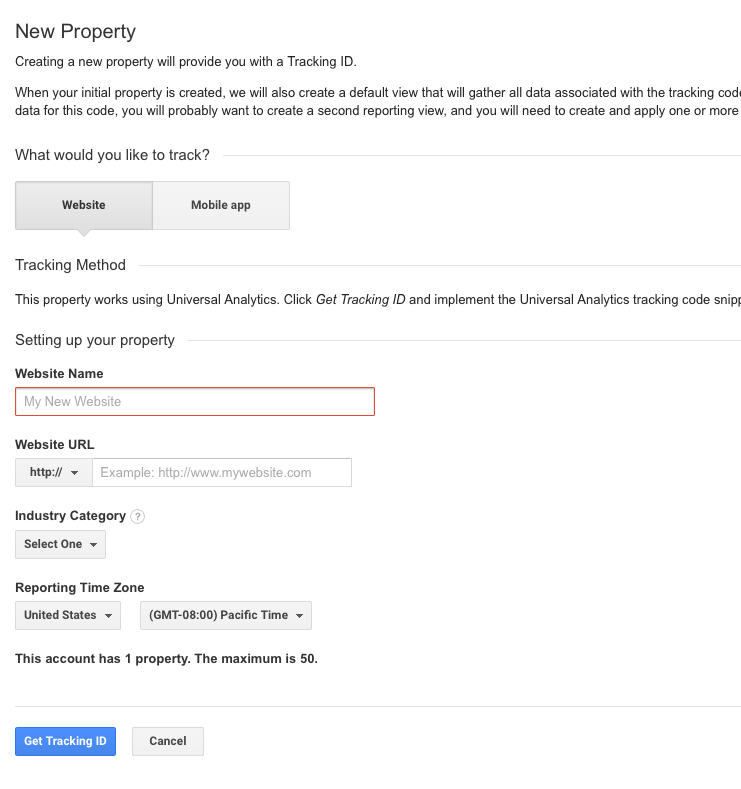
Choose website in this page:

Fill in website name and website url. Select one industry category.
Then click Get Tracking ID.
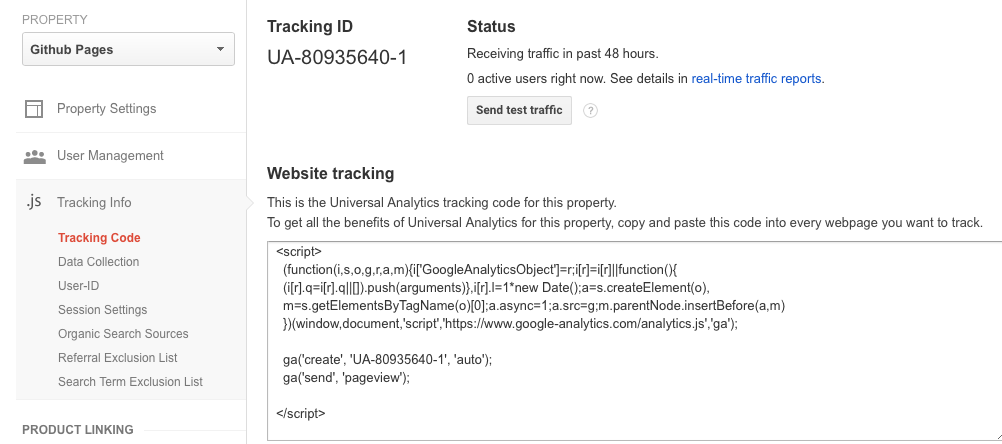
Now in your google analytics page, you will get a track ID such as UA-80935640-1 and some code for website tracking:

<a id="23"></a>Step Three
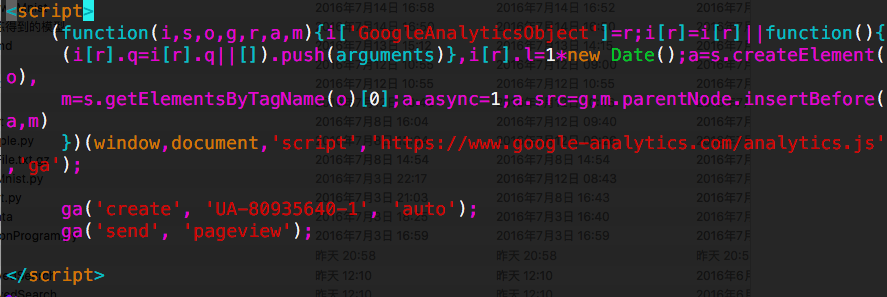
Copy the tracking code, create a google-analytics.html file in your jekyll website's _includes folder:

Put the code in this .html file:

<a id="24"></a>Step Four
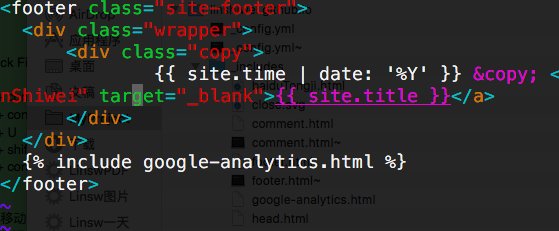
After creating google-analytics.html with tracking code from google analytics website, you can open the footer.html file in _include folder and add include google-analytics.html in it like the following:

This step will simply add analytics code to all pages in your website, which helps google to analyse.
<a id="25"></a>Final Step
We have added analytics code to website step by step. Now in Terminal of your website folder,let's run:
$ jekyll build
After that, you can preview your website at http://localhost:4000 by running:
$ jekyll serve
<a id="3"></a>Ending
If you use github to manage your website code, you can use github desktop to commit changes to master. The google analytics will work in no time. You can see the analytics report in your google analytics page.
By the way, if you want to know how to build your own blog in Github, here is another post for you.
My Github:LinShiwei (Lin Shiwei) · GitHub